One of the best things you can do to improve the quality of your screencasts, is improve the quality of your audio.
I’m assuming that unless your name is “Dr. Dre”, you probably do not have a professional sound studio in your basement full of high-end equipment and expensive software. And if you’re like me, you don’t even have a basement.
What I do have is a Blue Yeti microphone, GarageBand and a copy of Screenflow that I can barely afford. I’ve struggled for a long time to get my audio to sound “good”. I’ve gone back and forth on what the bar for that is. When I first got started, everything I recorded sounded like I was at the bottom of an empty can of tomato soup. With the help of some friends, some Googling and the wisdom of my wife, I’ve seriously improved my station. In this post, I’ll share with you the tips and tricks that you can use to immediately improve your audio quality.
The Room
First off, let’s talk about your recording space. You are going to want to work and record in the same area. I used to unplug and go into my closet and record. You don’t need to do this. But you do need to do some basic things to your work area.
When I first started recording in my office, everything was so echo’y. It sounded like I was in a bathtub. My wife pointed out to me that the bare walls, window and floor were not helping. She instituted 3 things in my office that made a whole world of difference.
-
She got an area rug. If you have hardwood, tile or laminate floors, an area rug is going to be essential. Sound loves to bounce off anything it can, and it really likes hard, flat surfaces. An area rug will work wonders.
-
She hung curtains next to the window. My drapes don’t even close. They are just there to soak up the sound.
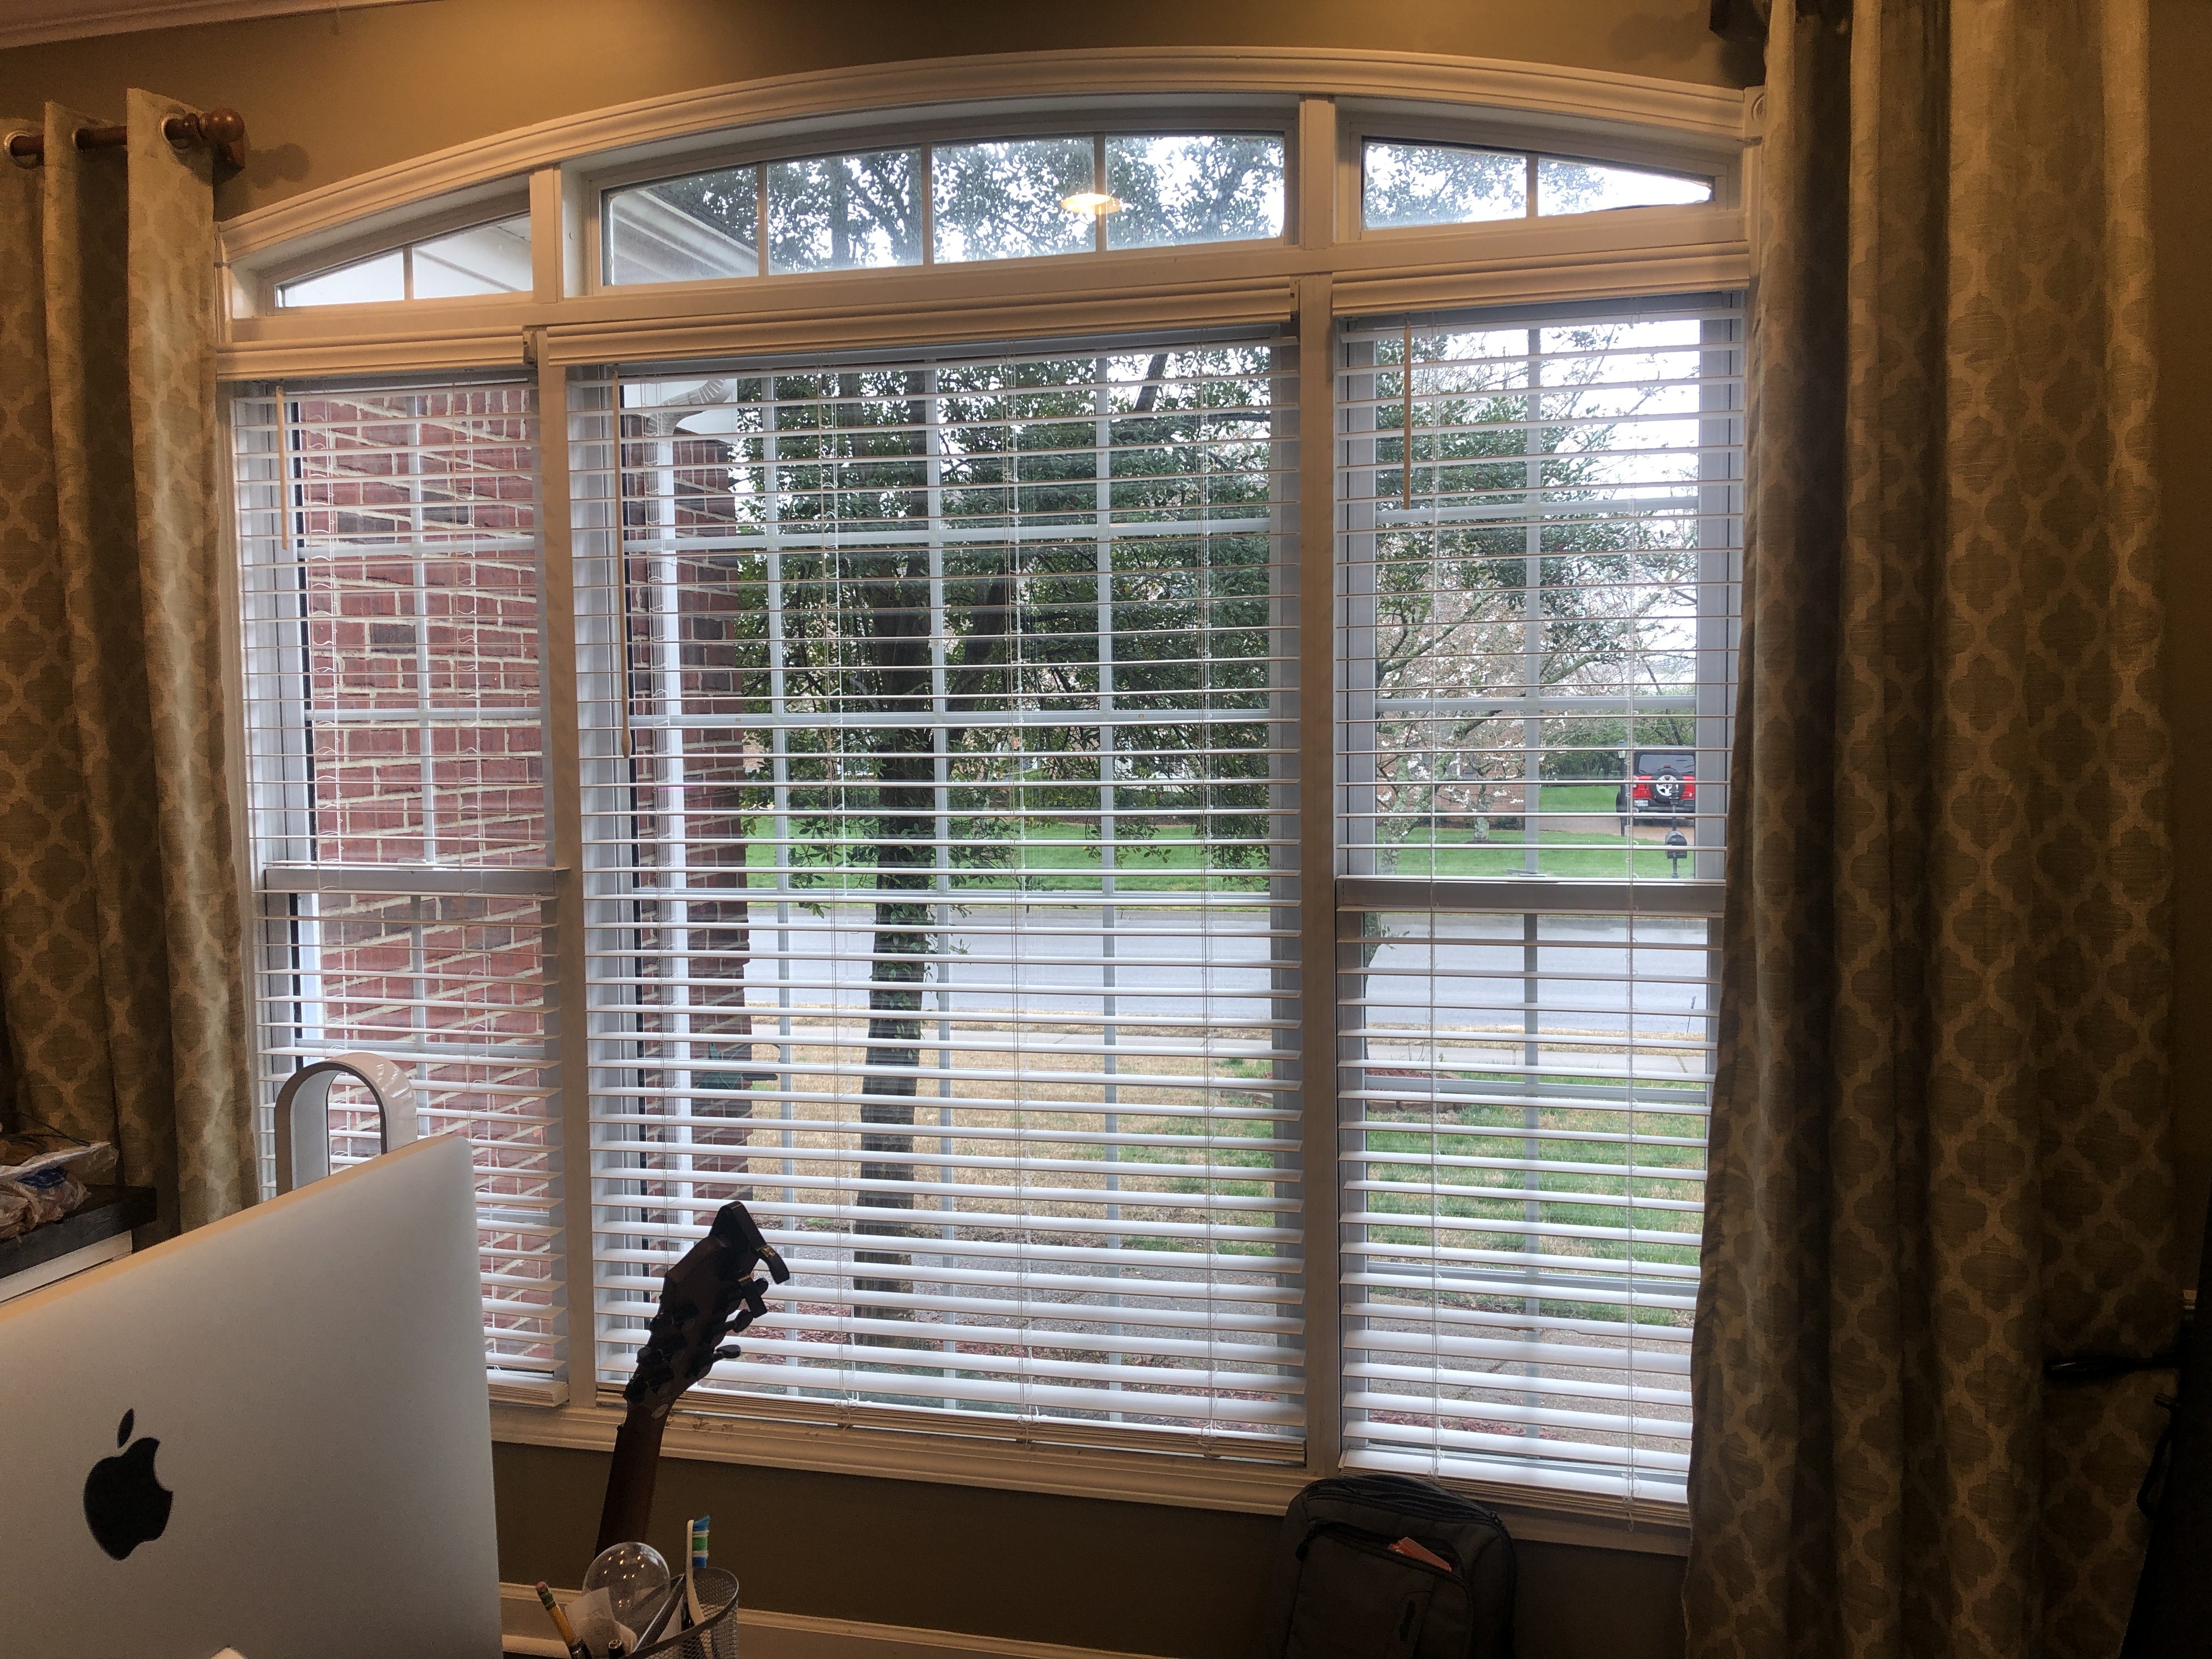
- She hung things on the walls. Pictures, guitars, sock monkeys. You get the idea.
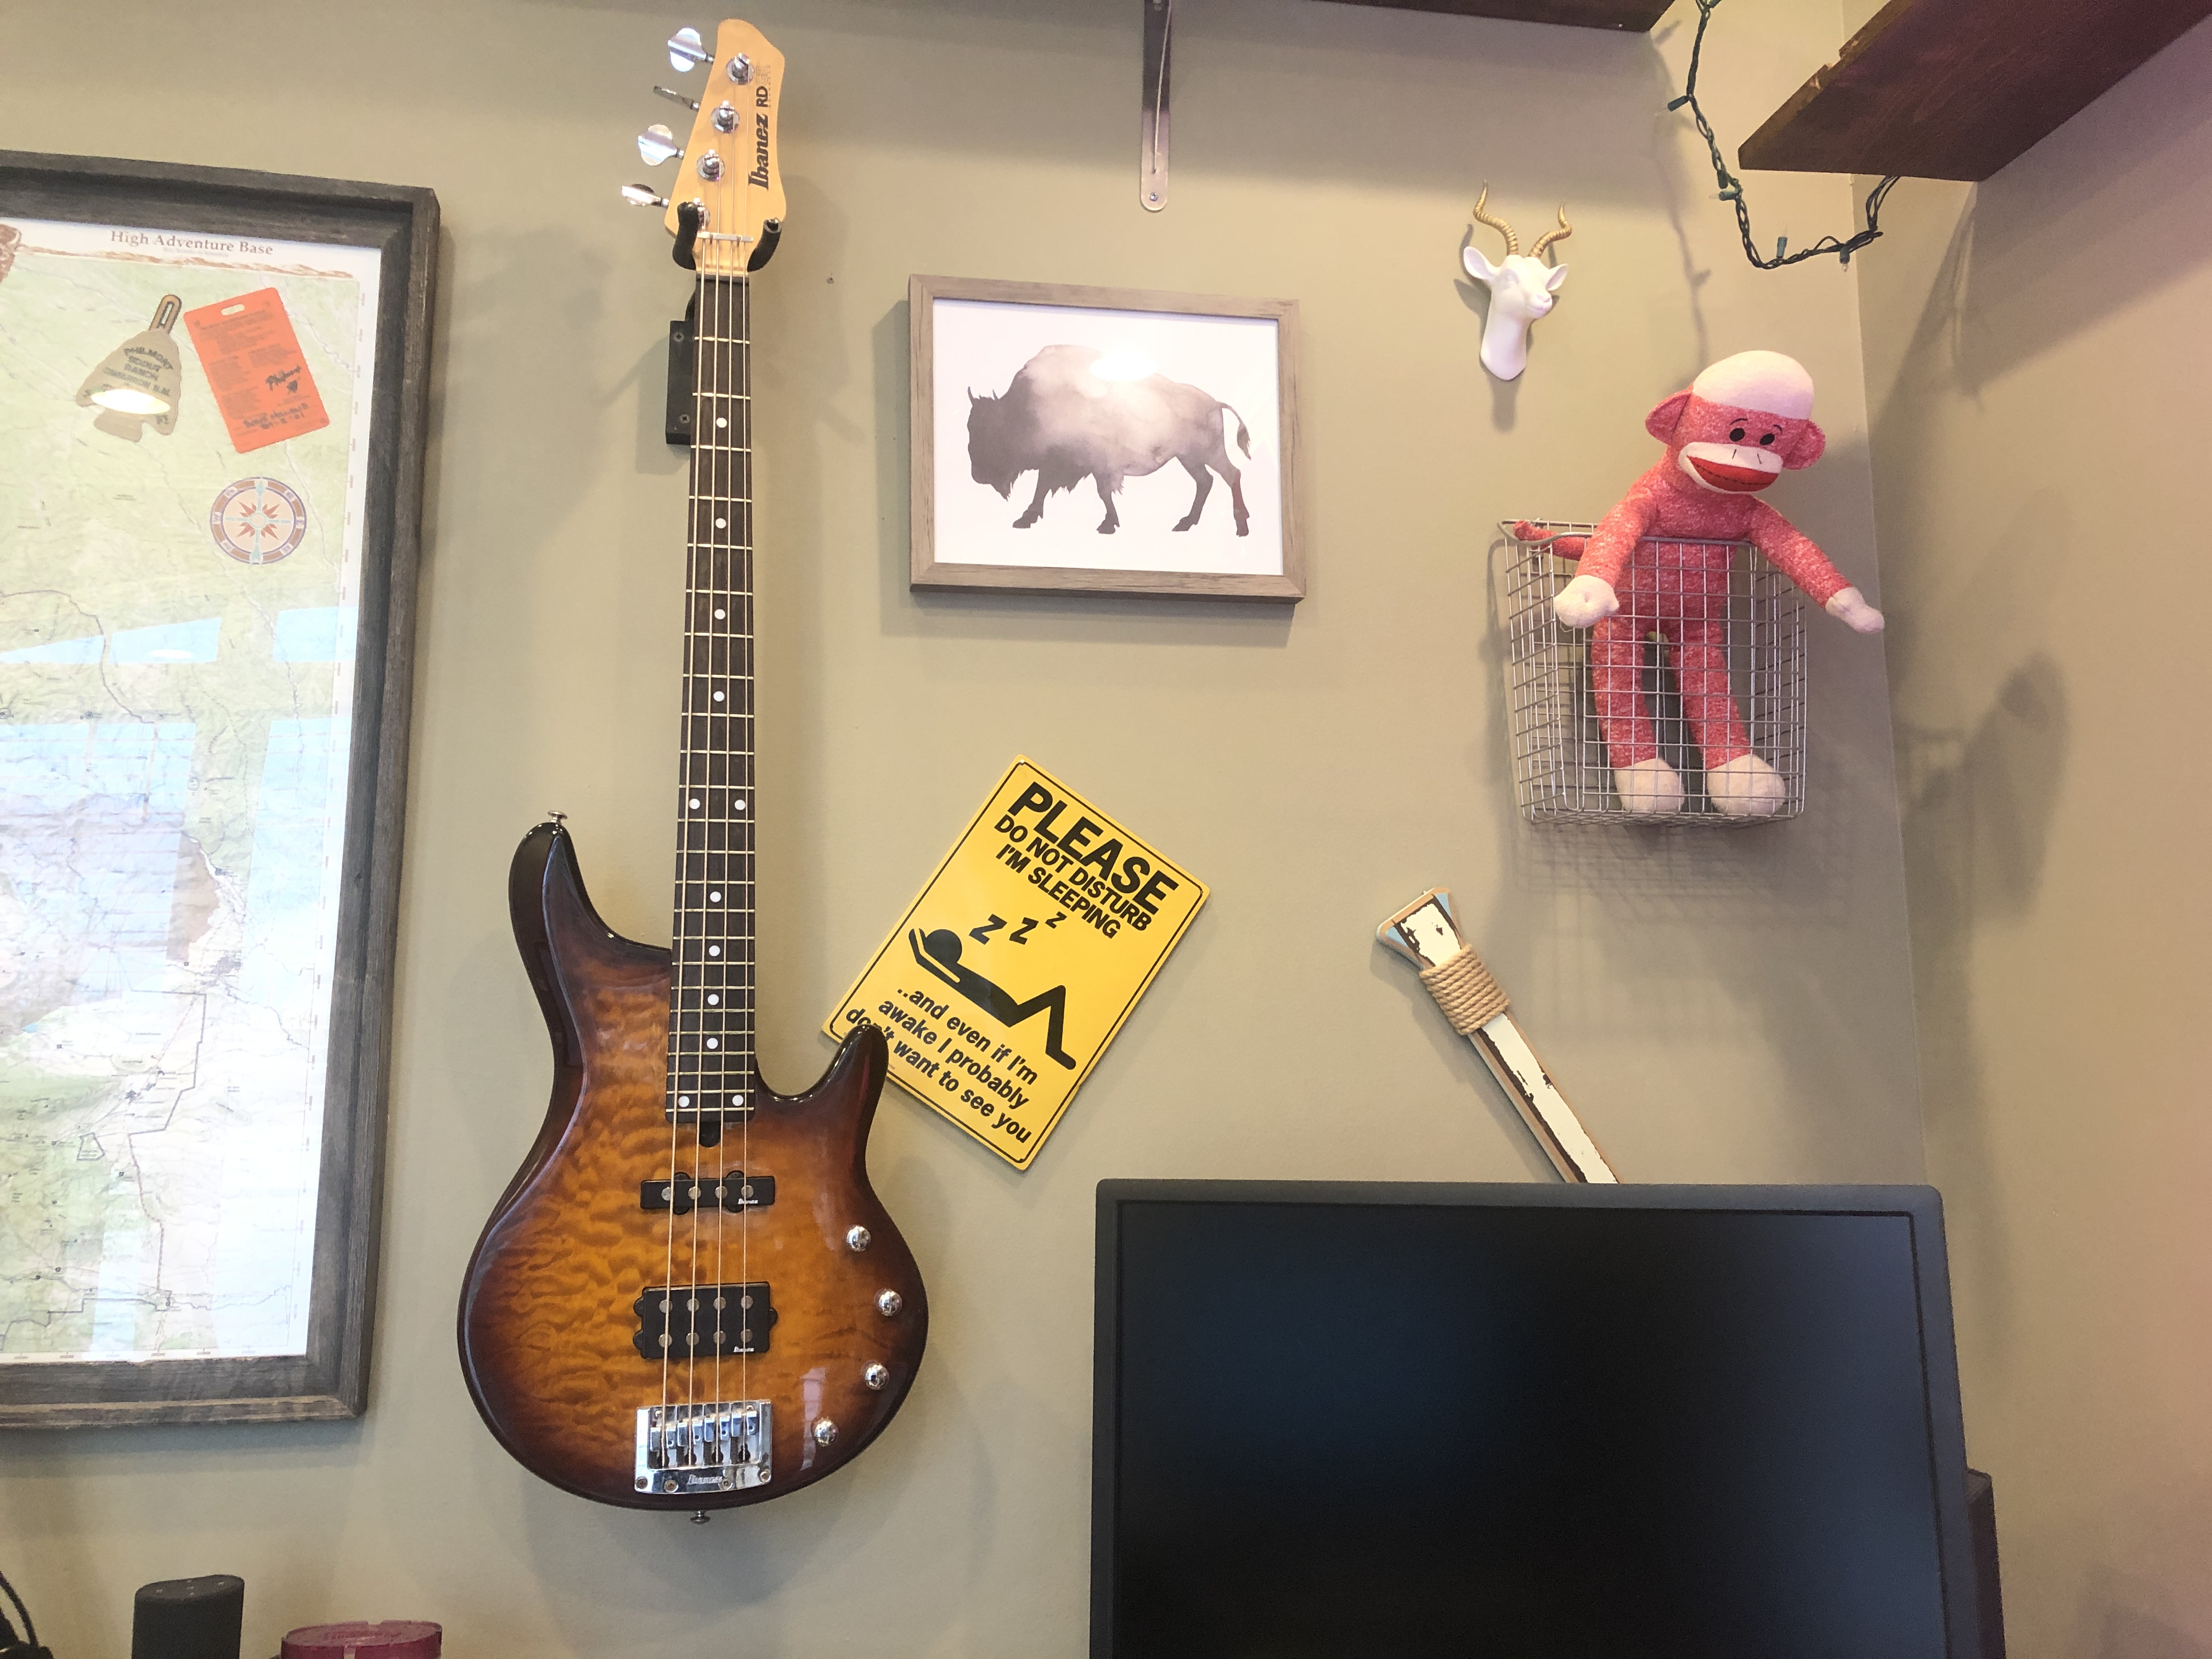
These 3 things were enough to dampen the sound in the room so that it is fit for recording. You don’t actually need a bunch of sound panels or a special box you made out of plywood that sits weirdly in your garage. Just a rug, some drapes and a few wall treatments will do the trick.
Next, let’s talk about the equipment.
The Equipment
At the risk of looking extremely self-absorbed, here is a picture of my current recording setup…
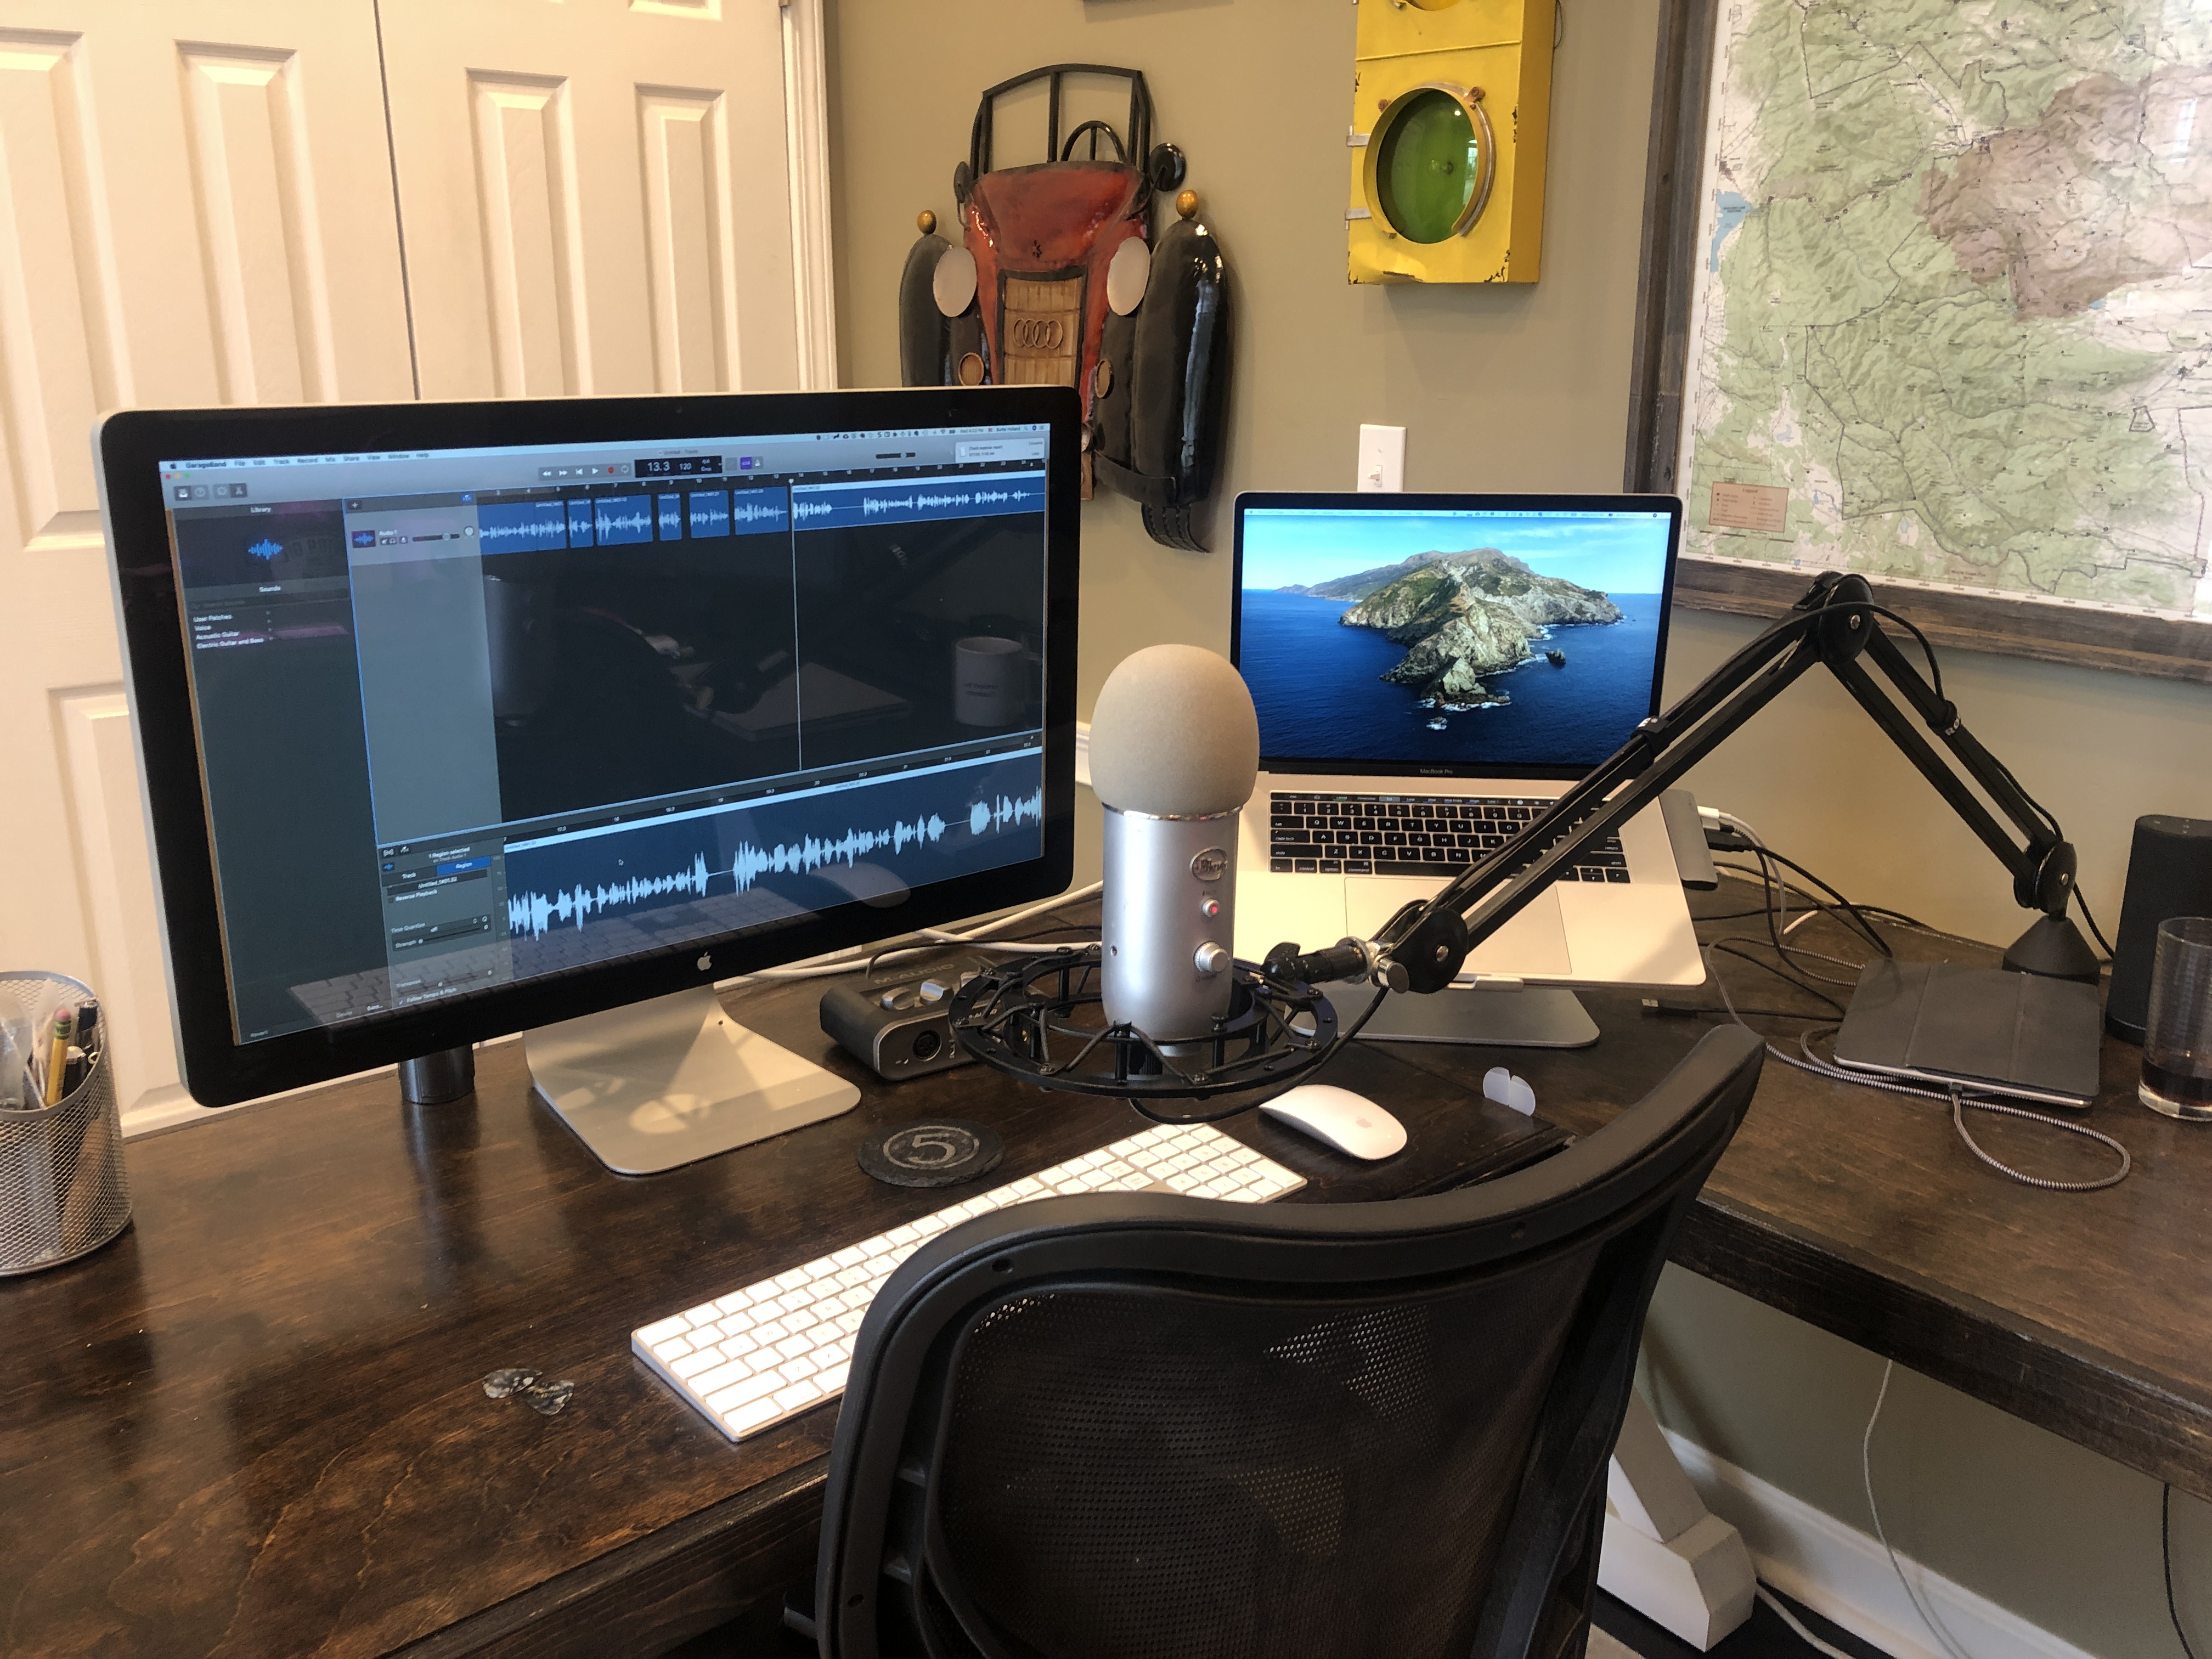
My setup will run you about 250$ total. Here are the essential components:
Blue Yeti Microphone (130$)
This is probably the most popular mic on the market. Some people will say the RODE is better, but don’t listen to them. Listen to me. I’m writing the blog post.
RODE PSA 1 Swivel Mount Boom Arm (100$)
If you plan to record audio and the screen at the same time, you have got to get the mic off of your work surface. If you don’t, the mic is going to pick up the concussion from your typing and it’s going to sound less like a keyboard and more like a death metal drum solo.
Foam Windscreen (13$)
You’ll see people with fancy windscreens and pop filters. That’s the big circle that you usually see between the mic and Taylor Swift when she’s in the recording studio. I almost bought one of these until my colleague Shayne Boyer pointed out that you can buy a 13$ Windscreen and it works brilliantly.
OK - that’s the equipment. Let’s talk about the mic configuration for a moment. There are a few key things you need to know about it.
Mic Configuration
The Blue Yeti is a condensor mic. This means that it’s super sensitive. If you don’t adjust it correctly, it’s going to pick up everything. And I do mean everything. If someone next door sneezes, your ears won’t pick it up, but I swear you will hear it on the video.
You can fix this, you just need to get the settings right. On the mic, there is a side that has a “Gain” and a “Pattern” option.
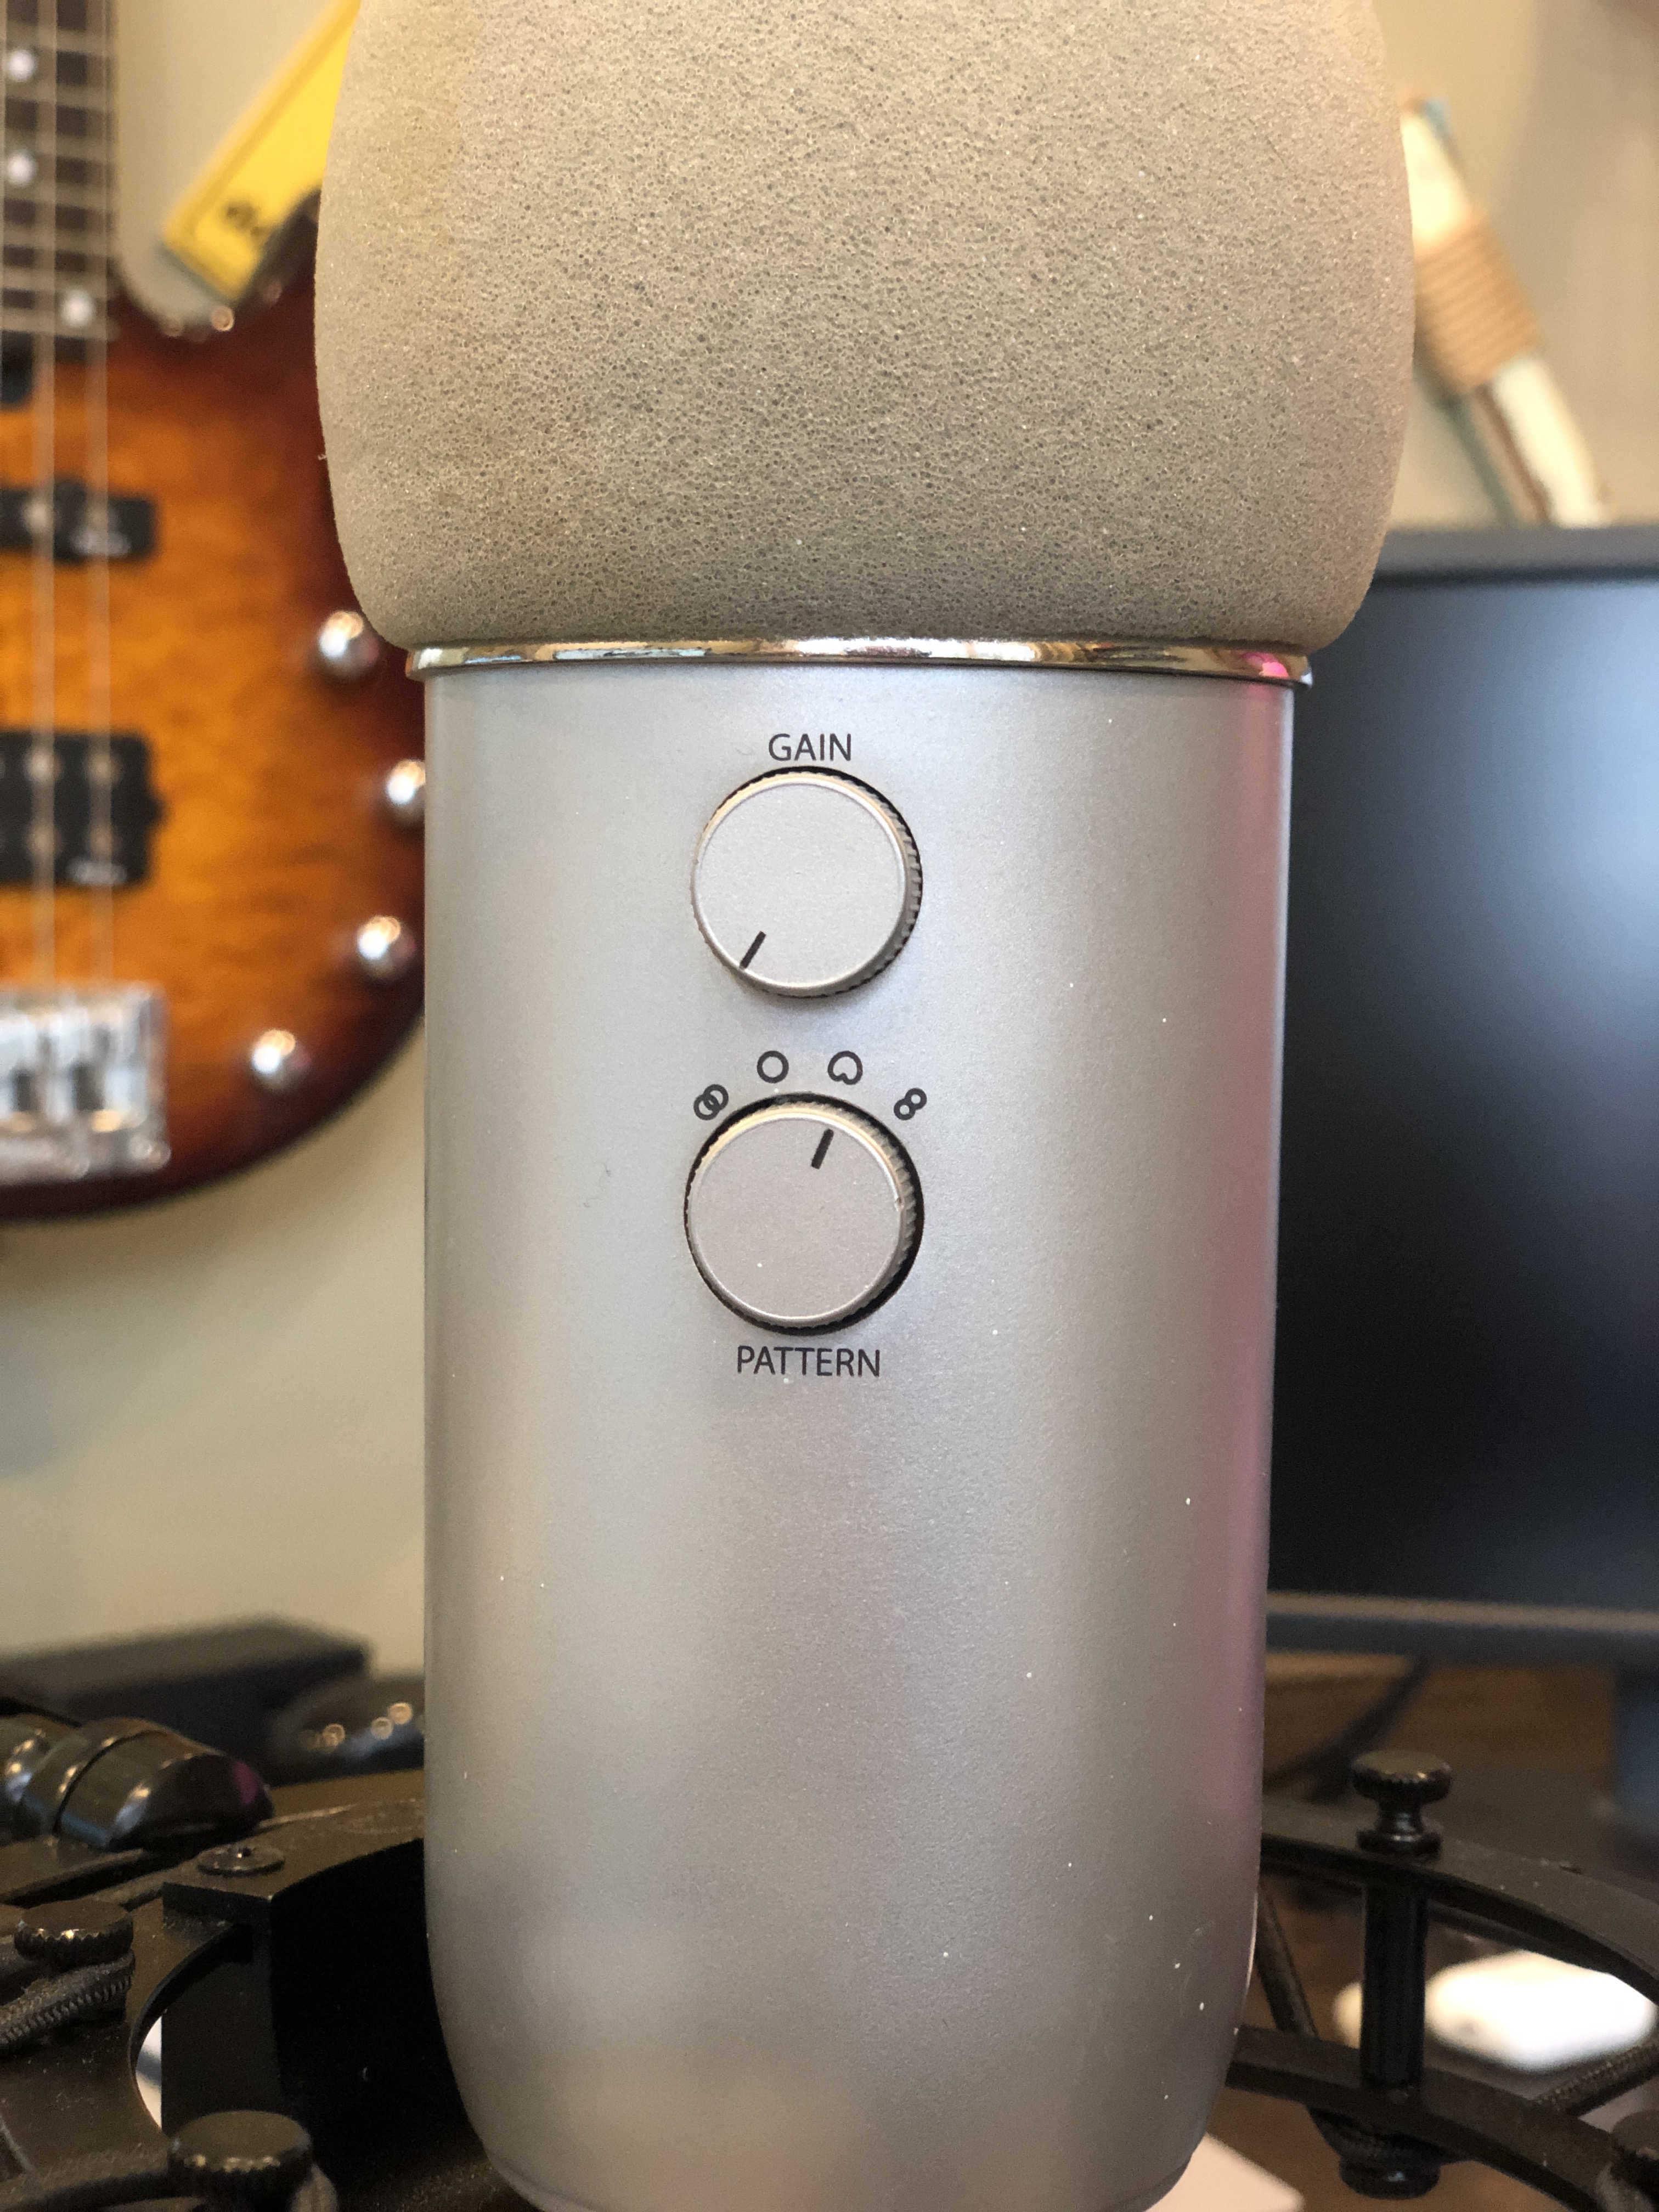
The “Gain” is how sensitive you want the mic to be. Since you only want it recording your voice, you want to turn the gain all the way down. That seems completely counter-intuitive, but I promise, this is where you want it.
The “Pattern” controls where on the mic the audio is picked up. All you have to know here is to pick the upside-down ♡ setting. This setting means that the microphone will pick up audio from the front-side only. That’s the side you are speaking into, so that’s what you want.
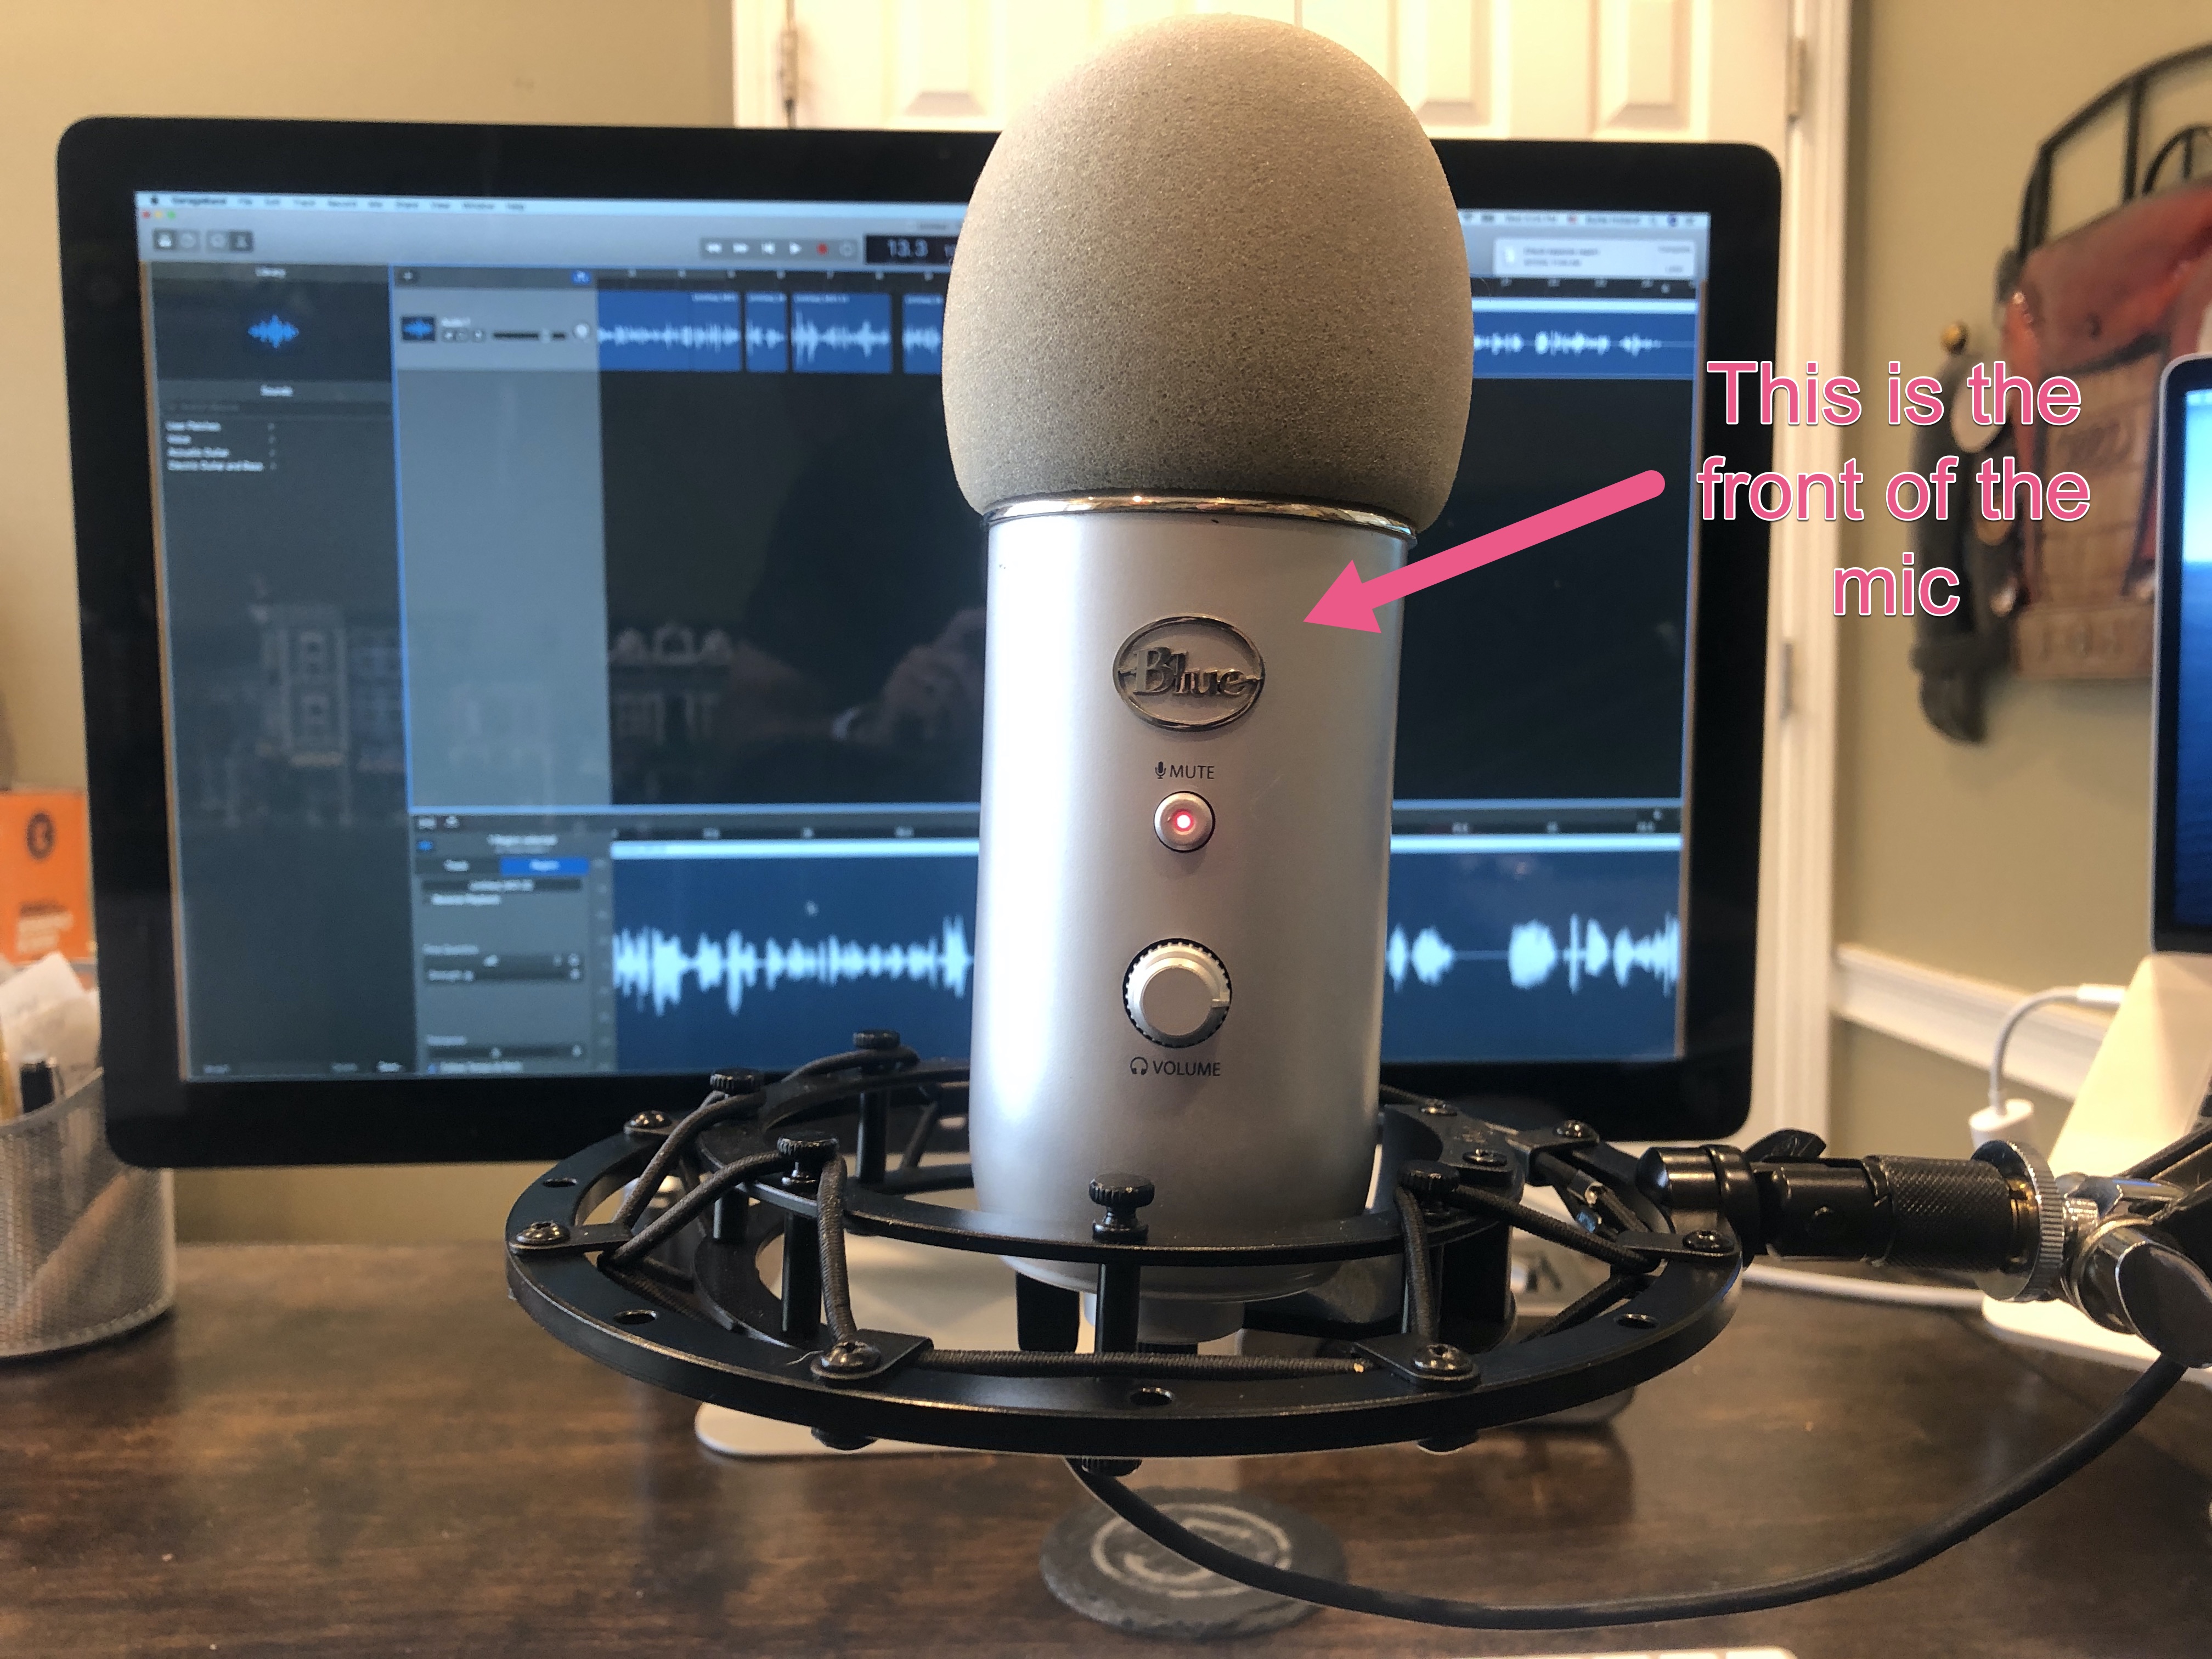
When you talk into the mic, you want it upright like you see it in the picture above. Talk into it from the front side, not the very top. The Blue Yeti site shows it like this…
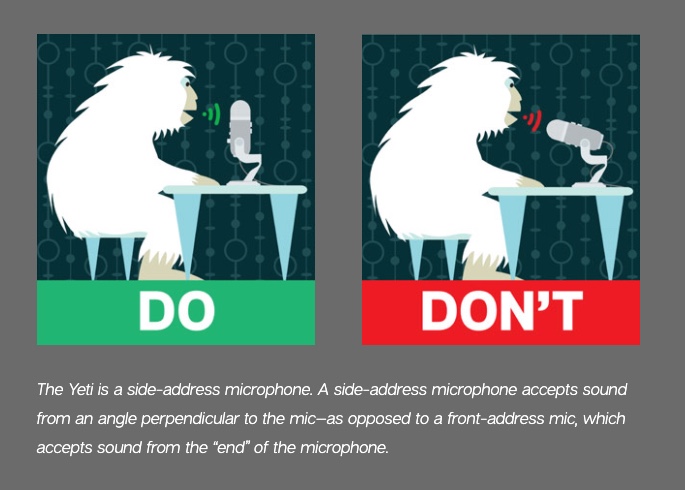
OK - you’re setup to record. The next step is to configure the recording software. When I record screencasts, I record audio first, then I record the video and edit it to go with the audio. This is so that I can record the audio with GarageBand and edit it before I add in the video.
Working with GarageBand
If you don’t have a Mac, I’m sorry. Feel free to skip over this section, and frankly, the rest of this post. I have no idea how to do this on Windows, although I’m sure there are some great alternatives.
For you Mac people, Garage Band is really all you need.
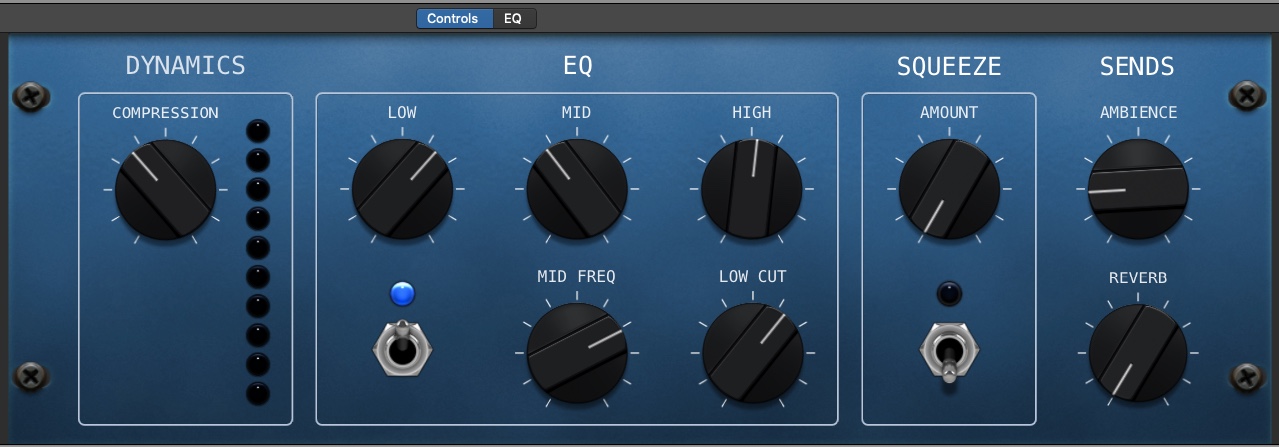
I record a Narration vocal and I created a custom audio setting using Nic Raboy’s excellent setup from an article on this same topic.
Now, change the way GarageBand is showing your track. By default, it shows “Beats and Project”, which displays your audio over time as “Bars”. This isn’t super helpful for seeing how long your track really is. To fix this, you want to change this so it displays your track as “Time”. This is a hard menu to find, but it’s that tiny arrow next to the “key” display.

Select “Time” from the menu that pops up.

After you record your audio, you’ll want to edit out your breathing, as well as pops and clicks and other mouth sounds you would rather not expose your listeners to. To do that, select the “Show Editor” option from the view menu.
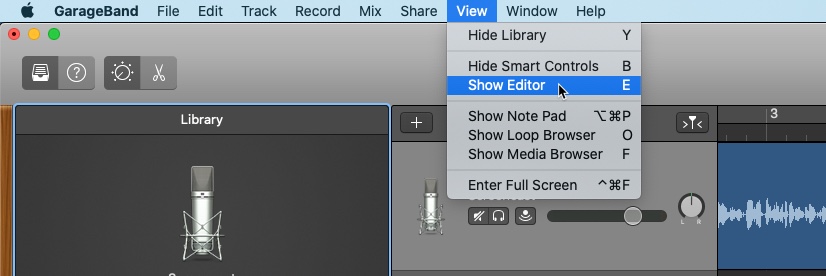
This will open up an editor in the bottom area that allows you to zoom in and edit out parts of the track. You’ll be able to see your breathing just by looking at the track. It’s the flat part in between sections. To remove that area, click and drag to highlight the region you want to remove, and then press “Delete”.
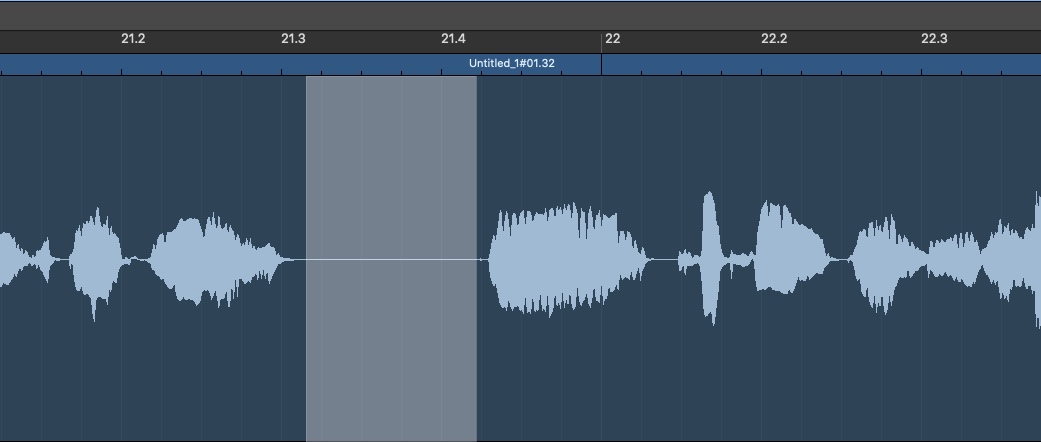
If you want to move your sections of audio closer together as you cut out the breathing, use the upper track portion. To do the fine grain editing itself, use the editor portion below.
OK! All your heavy breathing is now out of the picture and your audio sounds good. Export from GarageBand using the “Share/Export Song To Disk” option.
The last step is to pull it into Screenflow and apply some final tweaks.
Screenflow Audio Tweaks
Again, this is Mac specific. I do feel bad about the lack of cross-platform-icity in this article. That’s got to count for something.
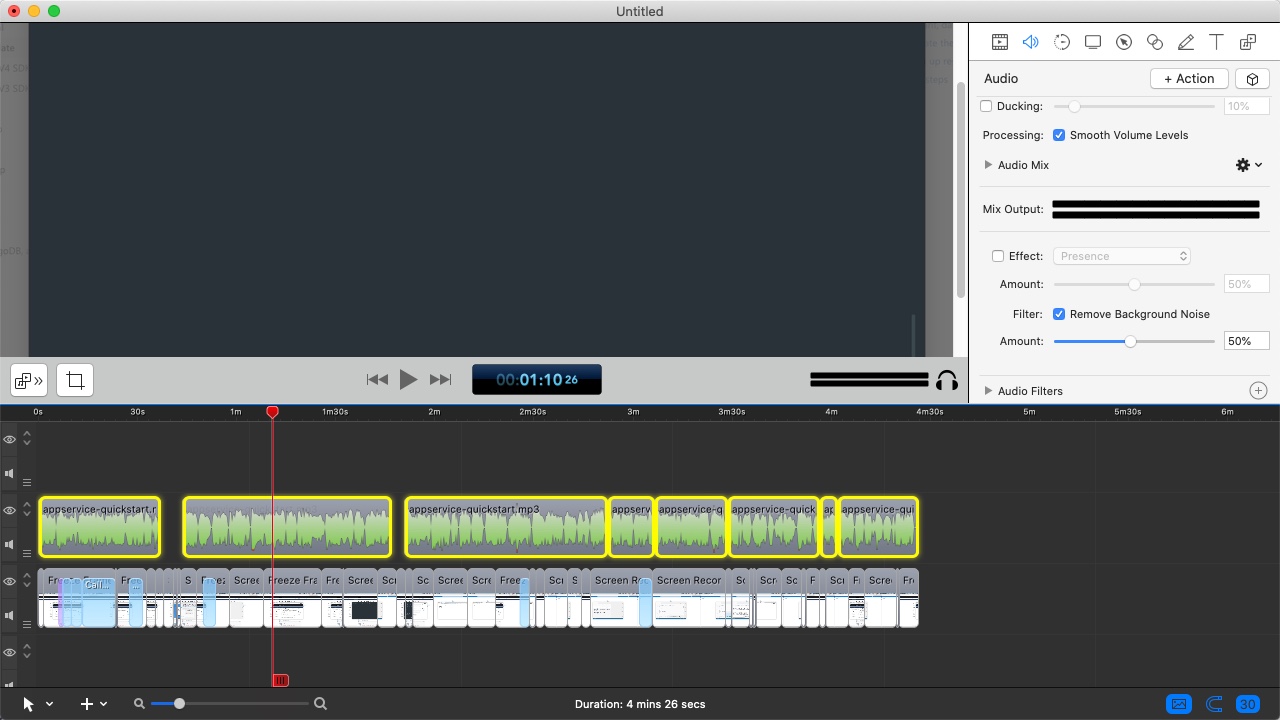
In Screenflow, I pull in the audio and then I record my screen to match the audio. This can be a bit tedious, but usually results in a higher quality video. One of the last things I do is tweak the audio in Screenflow.
I select the entire audio segment and I apply two options…
- Smooth Volume Levels
- Remove Background Noise (50%)
And…..CUT
That’s it! Hopefully there are some tips in here that you find helpful. Don’t be too hard on yourself over your audio. You are never going to get it perfect, but these simple steps should get you about 90% of the way there. The last 10% is all found in Dr. Dre’s basement.
Oh - and here’s a sample of my audio sounds. FWIW, the bass intro was also recorded in GarageBand…